25-step music production process checklist and video workshop >>>
A Solid Little Introduction to Audio Compression for New and Advanced Beginner Music Producers:
Before Compression, You Must Know About Dynamics:
So, what is dynamics when it comes to audio?
Audio compression is a form of dynamics processing used in music production. As a producer, it therefore helps to know a bit about dynamics before getting into dynamics processing and compression in specific.
Dynamics, in audio, refers to the difference in level between the loudest parts and the softest parts in the audio signal. This difference is called the dynamic range of the audio...
What is dynamic range in sound?
Dynamic range is used in many different cases to describe the ratio or difference between the minimum and maximum output or input of an audio system.
Dynamic range can refer to human hearing which has a dynamic range of about 120dB. It can also refer to the response of a microphone which describes at which levels the microphone can capture audio without distortion. Conversely it may describe the output capabilities of monitors, speakers or headphones. It could also refer to audio interfaces and musical instruments.
Pretty much anywhere you have sound, you have dynamic range. That's unless you live in an anechoic chamber and believe in the use of only sustained pure tones. ;-)
Some parts will always be louder than other parts and when that happens, you have dynamic range.
So, what is dynamics processing?
Dynamics processing is any kind of analog or digital processing which affects the dynamic range of the audio signal you put through it.
In music production this could include gates, expanders, limiters and even things like saturation. That's not why we're here though...
... we're here to talk about good old audio compression...
Audio Compression Explained:
Audio compression, a.k.a. dynamic range compression, as you probably know by now, allows you to reduce the dynamic range of single or groups of sounds or instruments in your mix.
How does audio compression work?
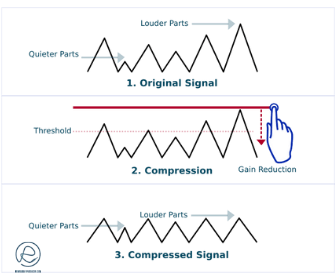
Compressors work by reducing the level of audio signal peaks which cross a set threshold. You can see compressors as an automated way to control levels in a mix.
What are the different types of compressors?
Compressors come in two forms; hardware and software.
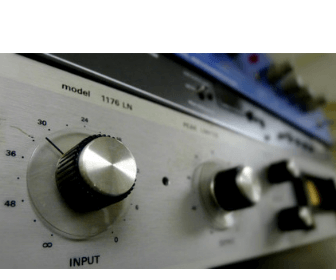
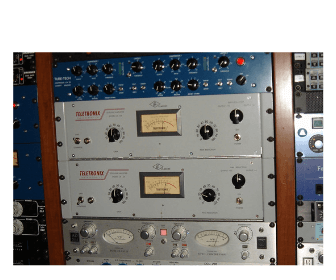
Now, in terms of hardware compressor units, you only have to sit through like just about any episode of Pensado's Place to know that engineers and producers start to spit out codes when they talk about their favorite compressors. LA-2A, 1176, dbx 160 to mention a few of the usual suspects.
These compressors all have stood the test of time and are useful in the studio, usually for very specific applications as the technology and circuits give each compressor distinct capabilities and a unique sound.
Hardware compressors fall into 6 main categories based on the type of technology under the hood. These are:
- VCA - Voltage Controlled Amplifier - SSL G Series, Emperical Labs Distressor
- FET - Field Effect Transistor - 1176, Daking FET III, Chandler Little Devil
- Opto - Optical - LA-2A, LA-3A, Avalon AD2044
- Variable-Mu - Vacuum Tube - Manly Variable Mu, RCA BA-6A, Altec 436, UA-175
- Diode Bridge - Diode Bridge Circuits - Neve 2264, Neve 33609, Rupert Neve Shelford Channel Strip
- PWM - Pulse Width Modulators - Great River PWM 501
You should read this excellent 2-page summary introduction to these types of compressors by David Silverstein here. After that you should read this post by Bobby Owsinski which lays out applications and limitations for each of the main types of audio compressors or emulations you'll work with as a producer.
The thing to realize, once you have a basic understanding of the above types of compressor, is that most software compressors fall into two main categories; those that emulate the hardware compressors and those that don't.
Most DAW stock compressors and non-emulation compressor plugins have way more control over the signal than you would in most of the above-mentioned hardware units or even the emulated software versions of these units.
So, a good strategy is to learn the main instances where the famous compressors are useful and try them in those instances. You can often get to a certain sound quick with just the turn of a few knobs.
Don't however be afraid to A/B other, newer, non-emulation compressor plugins. The tried-and-tested technique or compressor may not always be the best for the track you're producing.
It's good to experiment as often as you can and test different options until you get to know your available compressors and what they do to your sound. After a while you'll start to get a feel for what each compressor does and when to use which compressor.
Now that you know that you should know about dynamics and you've been introduced to the main types of audio compressors, it's time to take a quick look at the main audio compressor controls all new producers must grok...
Audio Compressor Controls:
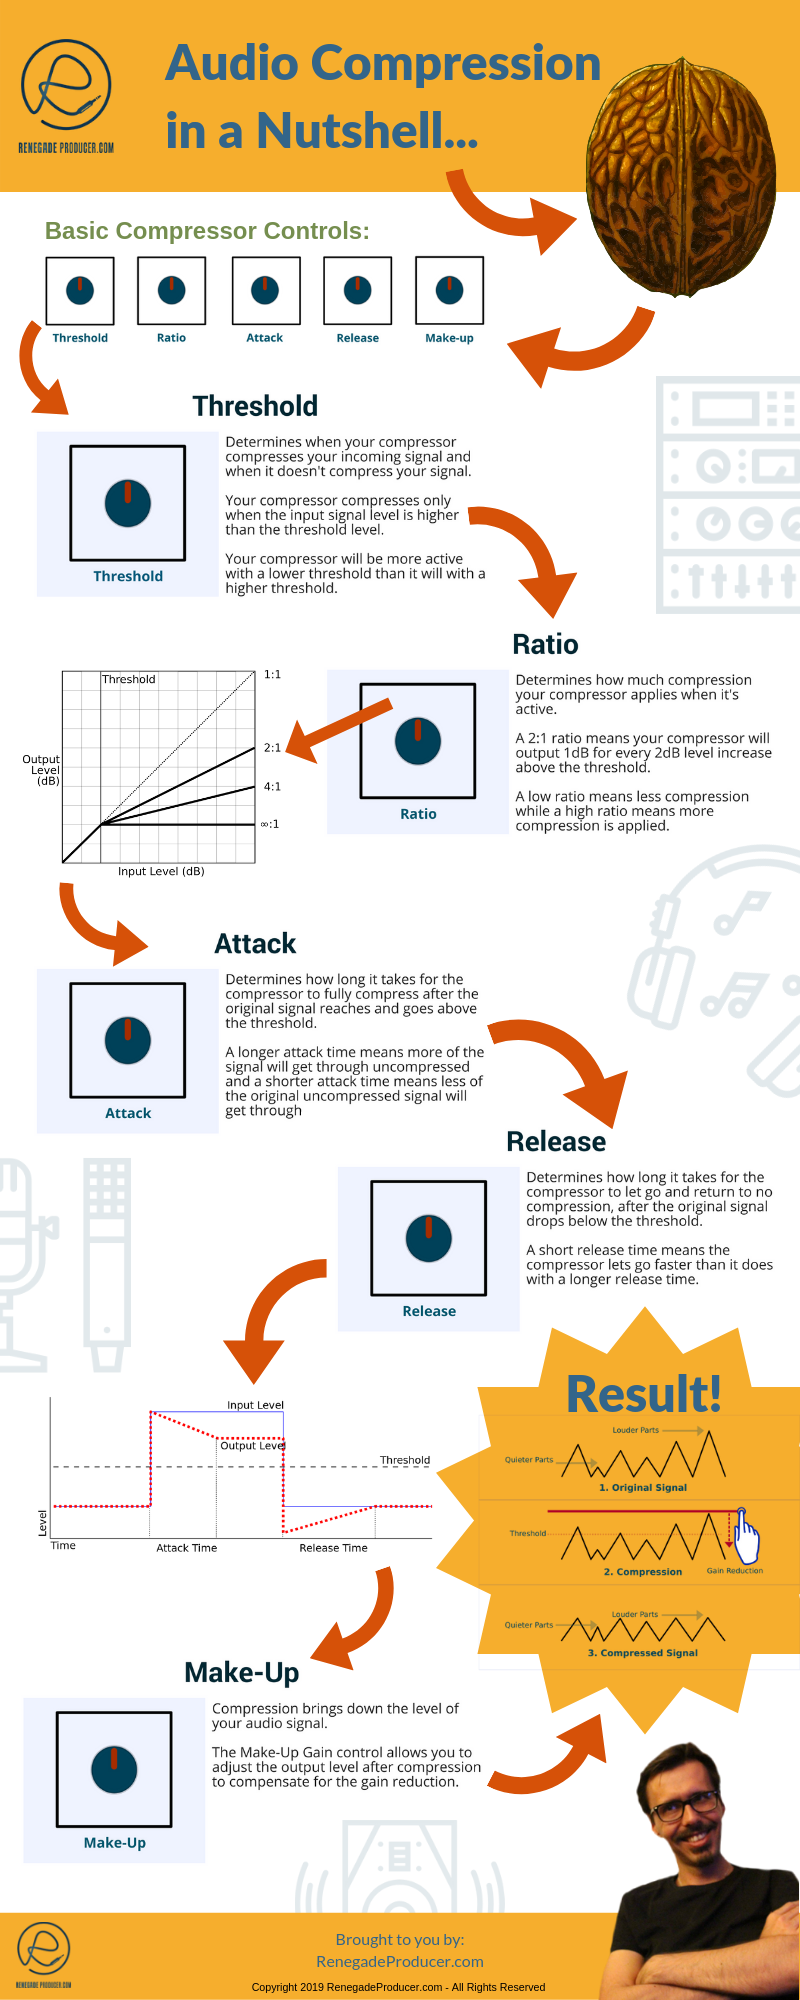
Threshold:
Common definition: The level the original signal has to reach for the audio compression to kick in.
Practical definition: How often the compressor will be active and working as the signal passes through it.
Pay attention to: The life of the sound. You rarely want your compressor to be active all the time. The parts you don't compress are just as important as the parts you compress. You want your quieter parts to come through to allow your track to breathe.
Attack:
Common definition: How quick the compressor goes from 0 to 100 once the original signal goes over the threshold.
Practical definition: How much of the original signal the compressor will let slip through after the threshold is crossed.
What to listen for: Listen to the leading edge of the sound you're compressing - is it thick or thin - a faster compressor attack will make the leading edge of the sound thinner and a slower attack will make it thicker.
Release:
Common definition: How quick the compressor stops working after the signal drops below the threshold.
Practical definition: How long the compressed signal will hang around after the original signal drops below the threshold.
What to listen for: Listen to the trailing edge of your sounds and how the signal moves back towards you.

What you want: You want a release setting that works musically with the playing or groove of the instrument or loop you're compressing. It's more about feeling than sound in a way. Can you dance to it? Does it make you feel like you're in zero-g? Does it bounce back well with the groove of the playing?
Ratio:
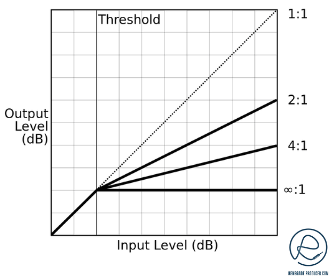
Common definition: How much audio compression is applied. For example; a 3:1 ratio means that for a 3dB increase in the original signal level beyond the threshold the compressor will allow only 1dB in level increase on it's output.
Practical definition: How firm/tight and big your sound will appear.
What to listen for: You want to strike the right balance between firmness and size. Too firm and you start to lose size and vice versa. Try to get the ratio as low as you can without losing the firmness you want from your compressed sound.
Make-up Gain:
Audio compression most often pulls down your peaks so the overall level of your signal is reduced when you compress. Your Make-up Gain is a simple amplifier or volume knob at the output of your compressor that allows you to compensate for the loss of level by pushing up the level.
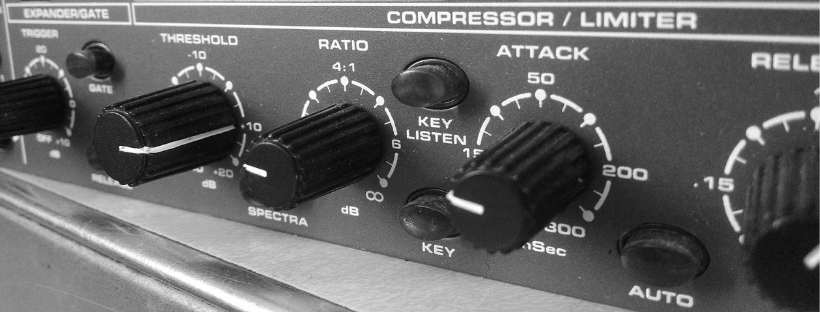
Check out this video I made recently for a quick overview and rundown of the basic audio compression controls you'll work with on a day-to-day basis as a music producer:
What are the different types of audio compression?
Compression, as you may imagine, comes in many different flavors. Below we take a quick look at the different types of compression methods you'll work with as a music producer.
1. Downward Compression
This is the type of compression that most people refer to when they say compression in a studio setting.
Downward compression reduces the level of signals which go over a certain set threshold. This means the dynamic range is reduced by bringing the peaks above the threshold down.
2. Upward Compression
Upward compression, as you may have guessed by now, does the exact opposite of downward compression.
This type of audio compression increases the level of sounds which fall below a certain set threshold.
3. Parallel Compression
Parallel compression is a type of parallel processing which allows you to both preserve transients and dynamics while at the same time getting more of the consistency or punch which comes from hard compression.
This means the original signal is split into two or duplicated and each channel is then processed independently. In most cases the main signal is left un-compressed while the duplicate channel is compressed heavily. The wanted result in the mix is then achieved when you blend the two channels together.
4. Side-chain Compression
A compressor with a side-chain input allows you to trigger or control the compressor's reaction via an external signal which in most cases will be an audio signal from another channel.
This means you can use your kick sound to duck your bass or synth, for example. This results in a slight decrease in level on your bass or synth each time the kick hits, which makes the kick cut through better. It can also be useful in avoiding frequency clashes as you remove potential problem frequencies by lowering the level.
If you've not heard side-chaining in action, you've not listened to dance music. It's everywhere! At the more extreme settings it sounds like the synth or bass pumps in relation to the kick. Believe me, you know it even if you don't know you know it. ;-)
This type of audio compression isn't just limited to dance music. Used subtly it's useful in many different mixing and music production scenarios.
5. Multiband Compression
Multiband compression is frequency-specific audio compression. This type of audio compression, as the name suggests, splits the incoming signal into different frequency ranges or bands. This means you get independent control for each band. So, you can compress each band with different compression settings or only compress certain bands while leaving others unaffected.
A typical use, for example, would be where you want to even out the mid-range of an instrument with compression but don't want to compress the lows. Multi-band compression can substitute for EQ as it's a way to control levels of specific frequencies in your spectrum.
6. Mid-Side Compression
Mid-side compression works by splitting your stereo signal into a mid and a side signal. You can then compress or not compress the mid and the side signals separately before you combine the two signals back into a full stereo image.
This is useful in many instances. Say you have a stereo drum track and you want to compress the kick while leaving the overheads alone. Slap on a mid-side compressor, set it to mid, set your compression, set it back to stereo and done.
How about leaving the kick alone and adjusting the dynamics of the overheads instead? Same process as above but work on the side channel instead of the mid channel.
7. Limiting
A Limiter is a compressor with a very high ratio setting. So, once you set your compressor's ratio to 10:1 or above you're in the land of limiting.
Brickwall limiting is when you set your ratio very high and have a very fast attack time too. Can anyone say Loudness Wars? ;-)
Limiters are useful in any scenario where you want an absolute ceiling where no signals may pass. This is why you'll often find a Limiter at the very end of a mastering chain. Limiters are however useful in other instances, like when you want to squash the life and dynamics out of a EDM bass on a parallel channel for example.
8. Leveling
A leveling amplifier is similar to a compressor or limiter in that you use it to reduce the dynamic range of an incoming audio signal. The main difference is that the ratio, attack and release are set in a leveling amplifier. The other difference is that it automatically adjusts the gain to make-up for level lost to dynamic range reduction.
9. De-Essing
Worth a mention since traditional de-essers use compression to reduce specific frequencies over a certain level from an audio signal. The most common use is therefore to remove sibilants like sharp s-sounds from vocals.
The compressor in this case reacts only to a narrow band of frequencies, usually in the 5-12kHz range dependent on the vocalist. These frequencies are used as a trigger to duck the entire signal when they cross the threshold. Smooth!
Now that we've taken a look at the main types of compressors available, the main audio compression controls and the different types of compression you'll use, it's time to take a look at some compression techniques and practices you can implement to step up your compression game to pro level...
Audio Compression Techniques of the Pros:
Compression is powerful and therefore it often gets abused due to functional ignorance and lack of experience.
Like other mixing skills, it's something we only get good at with experience, so patience is as essential as practice.
Competent compression skills aren't optional for music producers like me and you though!
So, here's 6 ways to level-up your audio compression game:
1. Leave It Off!

Over-compression is a thing. A very real thing.
Firstly, especially with electronic or dance music, samples and synth presets often already come compressed. Secondly, it’s too easy to fall into the habit, especially when you start out, to plug a compressor on everything. Thirdly, playback will often add more compression. Radio, clubs. They all do it.
Too much audio compression sucks the life out of your mix. Pros know when to leave the compressor switched off. Learn to do the same.
2. Know What You Want and Get What You Want...

Compress for a certain result and keep the compression in only if you achieve the result you aimed for. Want to make your bass sustain more solid? Dial in your settings and listen. Is it as you imagined? No? Switch off the compressor and tweak the parameters again. Switch on. How about now? Good? Great!
This trains your brain to go from idea to execution and result better than just turning knobs until you think it sounds right.
Know what you want first!
3. Overdo It!

Push your threshold all the way down and gain up. This will sound like a squashed pumping disaster of course. Go with it. Now adjust your attack while paying careful attention. Then set your release. Next, set your ratio. Now bring down the threshold until it sounds good and tweak.
This technique, when you get used to it, can make it easier to hear what the compressor is doing and dial in the perfect compression.
4. Push the Parallel

Heavy audio compression, especially with fast attack times, can quickly squash the living life out of an instrument. What if you want a more solid sound but straight compression just results in less dynamic range?
This is where parallel compression can help you strike a decent compromise between a more dynamic and compressed sound.
Here’s how:
Duplicate the track. Place your compressor on the duplicated track and EQ the duplicated track to taste. You may shave the top-end and lower-end off the duplicate to only leave a mid signal for your compressor.
Then, compensate for the duplicate compressed signal by carving out a bit of space in the original non-compressed track around the frequencies you have present in the duplicate track. Say, you cut everything below 250Hz and everything above 600Hz on the duplicate track. In this case you want to use a parametric EQ to carve out a bit of space between 250Hz and 600Hz.
Now set a nice balance in levels between the two channels et voila! You get to keep the transients and dynamics on the main channel and add a bit of body and oomph with the parallel channel.
5. Prep the Signal...

Your compressor, as you know, reacts to incoming signal levels that exceed the threshold. You want it to react in a musical way, consistent and steady with no unwanted artifacts like pumping and choking. You want it to dance along with the musical content you send through it and nothing else.
So, it helps to make your signal compressor-friendly by removing irrelevant sonic information from the signal before it hits the compressor.
Rumble from vocal recordings, for example, can produce unwanted compressor movements. Roll off the rumble with a high-pass filter to make sure the rumble doesn’t bother your compressor. Accentuate what you want the compressor to react to with your EQ settings.
Speaking of prep…
6. Compress the Compressed:
You can place a compressor before another compressor to prepare the signal and apply your compression in multiple stages. You want to be careful to keep your ratios lower on each compressor as ratios multiply as you add more compression. Remember, compression ratio multiplies. A 4:1 ratio on compressor X followed by a 2:1 ratio on compressor Y and then a 10:1 limiter at your mastering stage means an overall compression of 80:1! Got dynamics, bruh?
That said, subtle layers of serial audio compression can help you achieve a solid mix as long as you pay attention and keep your ratios lower at each stage of compression.
Take Rapid Massive Action for the Win:
- Load up a single sample and loop it.
- Load up a compressor plug-in as an insert.
- Now set a healthy ratio. Say, 4:1.
- Next, pull down the threshold or push the gain until you get a good 4-8dB of gain reduction.
- Now play around with different attack and release combos and note your results.
Repeat this with other compressors and note down any differences you notice between compressors with similar settings.
Then, load up a different sound, maybe get a longer legato bass or brass section going. Repeat the process. Make notes of your findings.
The point is to get to know your compressors and make the connections in your brain and nervous system. In time you'll be able to get the sound you want fast and with confidence. No more shooting in the dark!
In Conclusion:
Compression can seem a bit of a mystery to newer producers due to the high number of variables involved. It's also difficult to know what to listen for at first. It's hard to hear compression unless you've trained yourself to.
So, remember to work on your compression skills as often as possible but keep in mind that patience pays. Great compression skills come from experience and practice and can take years, even decades to become an expert at.
I trust that with the basic introduction above you'll have a good idea of the big picture of dynamic range compression.
This post is meant as an introduction so it's by no means a fully comprehensive training in audio compression.
I've included links to a few external articles on compression below for when you feel ready to expand your skills and knowledge and delve deeper into this powerful audio processing tool and techniques.
Audio Compression Articles to Help Deepen Your Knowledge:
Sound-on-Sound: Compression Made Easy
Sound-on-Sound: Parallel Compression
Sound-on-Sound: Mix Compression
Sound-on-Sound: Multi-Band Compression
Get More Skills for Your Producer Skill-Stack:


Learn to understand equalisers and frequencies to supercharge your mixing skills and get results, fast...

New producer? Learn everything you need to produce your first professional track right now...

Would you like to discover the simplest and easiest way to learn music theory as a music producer?
Share this post. Spread the knowledge so other producers can benefit too:
- Renegade Producer
- Producer Skills
- Compression
ⓘ Some pages contain affiliate links so I might earn a commission when you buy through my links. Thanks for your support! Learn more
