25-step music production process checklist and video workshop >>>
Learn How to Use Reverb in Music Production & Mixing With This Guide
Learn reverb basics, types of reverb effects, reverb parameters & controls and how to use reverb like a pro! Plus, discover a few excellent free and commercial reverb plugin options to get started out with right now.

"The Sounds That Are Used Are Not Cheap..."
The use of reverb in music production and mixing is something you cannot avoid if you want to produce great tracks. That, as you probably know by now, is a cold hard fact.
Do reverb right and your mixes have depth, sheen and that elusive “expensive sounding sounds” as music production philosopher extraordinaire, Biebs, would say:
Do reverb wrong though and it’s an instant giveaway of your amateur status as a producer or mixer.
So, how do we make sure we keep our sounds sounding expensive enough for our bro Biebs?
In
this post below we delve deep into the depths of reverb in music production and mixing. We look at
what reverb is, which types of reverb you get and we also discuss how
to use reverb in music production to make sure our sounds are sounding expensive. Just how the Biebs
likes it. ;-)
So, Let’s Get Real About Reverb for a Moment:
Reverb, in a real life acoustic space, is made up of reflections of sound waves bouncing off reflective surfaces and coming back to your ear. So you hear the direct sound coming from the source and you hear the reflected sound bouncing off surfaces at the same time. Our brain uses these reflected sounds to create a sense of the space.
In natural environments you hear a combination of direct sound, early reflections and a reverb tail as the sound continues to bounce around and taper off into silence. It pays to have the basic idea of how organic reverb works in a real-world acoustic space before you get into the wild and wonderful world of software and hardware reverb emulations like rack reverbs and DAW plug-ins.
The Physics of Natural Reverb:
Imagine you have a room with a speaker on one side of the room and a microphone on the other side. Now imagine you pulse a tone or sound through the speaker.
What happens?
The speaker cone vibrates to produce the sound waves, some of which hit the mic diaphragm before hitting any other surface. We call these sound waves direct sound UNTIL they hit and bounce back off a surface at which point they become reflected sounds.
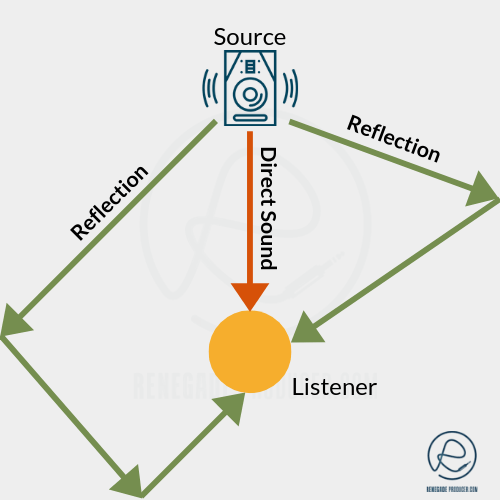 Simplified Diagram Showing the Difference Between Reflections and Direct Sound in an Acoustic Space
The first reflected sounds that reach the diaphragm of the mic are called early reflections.
Reflections will of course continue to bounce between surfaces as long as they have acoustic energy to propagate. The interaction of all these reflections and reflections of reflections of reflections will start to fade as direct sound fades away. The reflected sound you hear after the early reflections is often referred to as the reverb tail.
The Reverb Effect:
In audio engineering, sound design and music production we use reverb units or software plug-ins to add reverb to our mix. Reverb units and reverb plug-ins are processors that use analog and/or digital technology to generate reverb effects when audio signals are sent through them.
As a new producer, just knowing what reverb units are, what they do, which types they come in and how to use them in your mix is good enough. So here we go...
Common Types of Reverb Effects Used in Music Production:
Room Reverb:
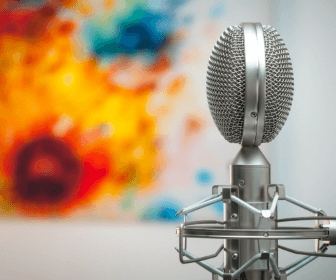
Room reverb emulates the reverb sound of small room-type acoustic spaces.
This type of reverb works well with a short reverb decay time setting which gives presence to an instrument or sound in your mix without having to change the level of the instrument.
What's it good for?
Room reverb works well on drums, percussion, piano, guitar and synth sounds.
Chamber Reverb:
Chamber reverb emulates the echo chambers found in some studios.
The chamber is a room with speaker and microphone. The speaker and mic
are connected to the engineer's mix console in a separate control room.
The engineer can add reverb by sending some sound through the speaker and adding the sound output of the microphone back into the mix. You can make changes to the reverb character in a traditional chamber only by moving the mic or speaker around in the room, or adjusting surfaces in the room.
Check out an older-than-old-school 1952 video with a proper echo chamber in full effect!
The room could of course be, and has been in many cases, a stairwell, bathroom or any other room that was close enough to the control room setup.
What's it good for?
Chamber reverb works well on vocals and various other instruments.
Hall Reverb:

Hall reverb simulates reverb based on the dimensions of the traditional, usually rectangular, concert hall.
The larger size of the hall implies that longer sound waves, i.e. low frequency waves, are reverberated which means the wet reverb signal will contain low frequency energy. The larger size also makes for a sound that slaps back very near to echo.
What's it good for?
Hall reverb is good for many things but more
likely to be used on piano, organ, strings, pads and maybe vocals.
Too
much hall reverb in music will swamp the dry sound and cause it to drift back into an ocean
of reverb. So, it's a good idea to pay careful attention to the dry/wet mix and tame the reverb with EQ or compression.
Plate Reverb:
A physical plate reverb is a mechanical device which consists of a metal plate, with a transducer and contact microphone attached, suspended within a metal frame by springs. The original sound gets driven into the plate by way of the transducer. The contact mic or mics pic up the wet sound output and make it available to be added to the dry sound.
Plate reverb has a more immediate quality to it than a room-type reverb due to the fact that the reverb is dense and arrives full without a gradual build.
What's it good for?
Plates are usually good on percussion, drums and vocals, where the pulling-back effect of a room reverb may work less well and the early reflections could wreak havoc with your groove.
Spring Reverb:
A real spring reverb works similar to a plate reverb except that the transducer and pickup are attached to a set of coiled springs instead of a flat plate.
The springs impart a distinctive "boing-boing" quality to the reverb sound. Think retro-style Cali-surf guitar dub kind of twang.
What's it good for?
Spring reverb in music can work well on guitars and vocals but quickly add a strong dated retro feel unless you're really subtle when you mix it back in. Not used too often in modern pop or dance productions. The sound is a bit like Marmite/Bovril. Some love it, others hate it.
A brief and concise overview of spring and plate reverbs, examples included. #win
Reverb Unit Parameters & Controls:
Now, you know the most common types of reverb in music production and what they are most often used with.
So, it's time to delve a bit deeper and explore the parameters and controls used to dial up reverb in your mix...
Reverb Mix:
This button allows you to adjust the ratio between your original dry audio signal and your wet reverb output signal to create a blend that works in your track. Can also be labeled Wet/Dry.
Reverb Time/Decay/RT60:
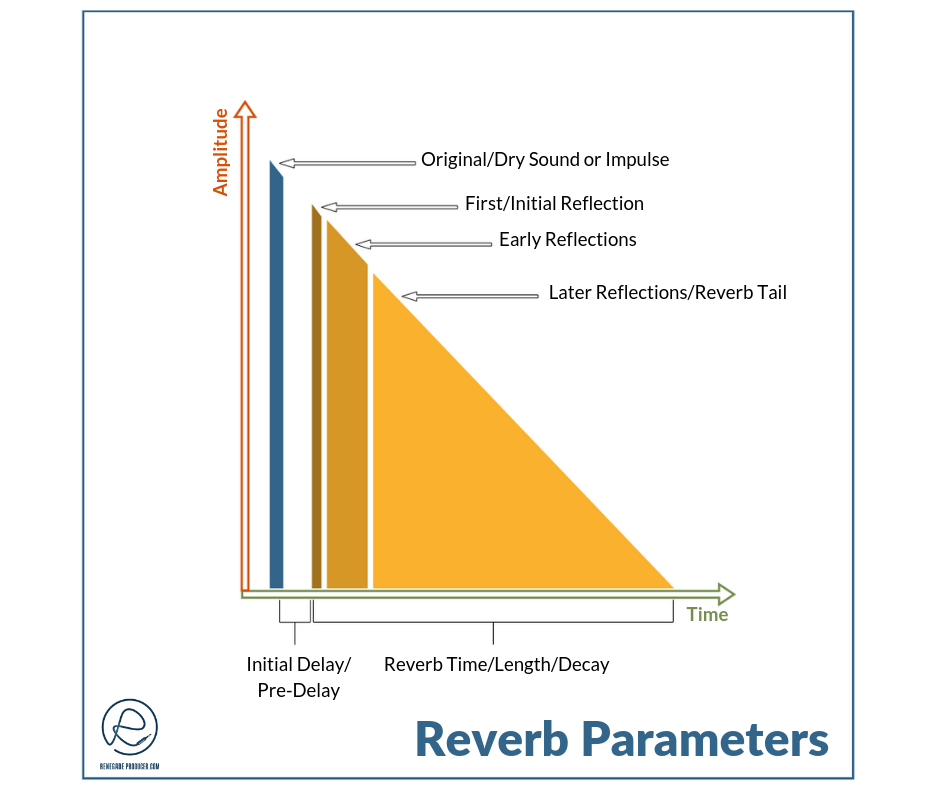
The time it takes for reflections to decay 60 dB in level at 1kHz. This control allows you to adjust the length of your reverb tail.
In most cases it's referred to as reverb time.
Reverb Size:
Refers to length of your longest room dimension. Longer = Bigger Room = Bigger Reverb!
Reverb Width:
How wide or narrow your reverb sound is spread out in the stereo field.
Pre-Delay:
The time between the direct sound and the first reflection.
Early Reflections:
This reverb control allows you to set the level of the initial group of reflections.
Reverb Density:
Sets the amount of reflections and how these reflections are spread out in time to control how dense the reverb sounds.
Reverb Diffusion:
Allows you to change the way the reflections sound as they decay in terms of clarity, brightness and color.
Reverb Damping:
This allows you to shorten the decay time of certain specific frequencies. This can help you set the tone of your wet reverb.
Filters:
Most reverbs will also have filter controls that allow you to roll off frequencies with high-pass or low-pass filters and envelope controls that allow you to further shape your reverb sound.
How to Use Reverb in Music Production Like a Pro:
It's been said that you can easily spot the difference between a pro and amateur mix by listening to the use of reverb.
Too much and you lose clarity and separation which results in mud.
Too little and you lack depth and a sense of space in the mix.
The word "appropriate" is the key to that expensive reverb sound. You want it just right.
Pro mixing engineers and producers can dial in a good reverb in seconds because they have the knowledge, skills and experience to know what will work and how best to achieve the result they want.
Here are some quick tips and techniques to help you get that pro reverb sound:
1. Less is More:
It’s easy to overdo the amount of reverb you add to your mix. The problem is space in the mix is limited and reverb sure does love to take up space. So, it pays to be specific and intentional when you add your reverb.
2. Reverb Relativity:
The amount of reverb you add, like most things in mixing and life, is also relative. Do you have only an 808 kick, snare, hat, bass and vocal in your super-minimal-techno-chill-pop track? Slather that vocal with reverb like thick, chunky ketchup on french fries! Or, do it to the snare and see what happens. Heck, even try that kick while you’re at it.
Point is, if you have the space in your mix, reverb is one good way to fill it up.
A full, busy mix may however require a different strategy…
3. Use Delay Instead:
Delay can create space without the need for reverb. Delay is also less dense in most cases so it’s a better option for fuller mixes where you don’t have much space left in your mix.
The trick is to use a stereo delay with different delay times in the left and right channels. Experiment with this until you find a setting that works in your mix.
4. Restrict Your Reverb:
It’s not only the wet/dry amount you should watch. A solid mix can be tricky to achieve when you add too many different types of reverb to your mix at once. This is because it’s difficult to make all the reverb shapes work together as a pleasant cohesive unity.
Limit yourself to 2 or 3 different types of reverb per mix. You could have one black-hole, one smaller room and one plate reverb, for example. Set your reverbs up as FX tracks and feed them with your sends from individual channels or groups.
This allows you to add any of three types of reverb to any channel. You can also create a blend or combinations of your reverbs without the reverb getting muddy.
Speaking of muddy…
5. EQ Your Reverb:
Reverb, as mentioned, likes to take up space. You can remedy this when you EQ your reverb return. In most cases you can safely roll off the low-end with a high-pass filter to make space for the bass elements. A low-pass lightly rolling off the top-end of your reverb can open up a bit of space for your hats and other high information like frequencies that make vocals intelligible.
6. Compress Your Reverb:
Compression offers you a way to control and tame your reverb dynamics. Experiment with both normal and side-chain compression after your reverb.
Trigger your side-chain with your kick and snare or lightly duck your reverb with the vocal track to help your vocals cut through the mix with ease.
7. Parallel Park It:
Place your reverb plugin as an FX channel/bus that you can send your individual or group channels to. Or, duplicate the track and put the reverb only on the duplicate track that you run in parallel. Blend it with your original signal.
Both these approaches allow you much greater control over your reverb as you can EQ, compress and apply other processing to the parallel track instead of the original track.
A Few Good Reverb Plugins:
Free Reverb Plugins
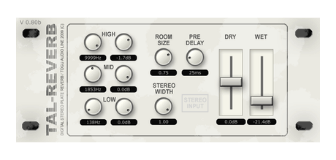
TAL-REVERB
Simple interface, no-frills, easy to use and best of all, free!
TAL-REVERB is a great little reverb to get started with,
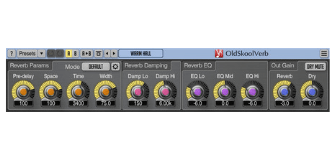
Voxengo OldSkoolVerb
Plate? Room? Hall? Voxengo's OldSkoolVerb has you covered. Oh, and did we mention it's also free as in beer? Oh yes!
Commercial Reverb Plugins
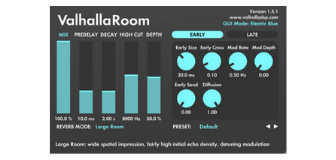
Valhalla Reverb Plugins:
It's not only Valhalla Room. ValhallaDSP produces a suite of reverb plugins, all top-notch and at a price that won't break the bank.
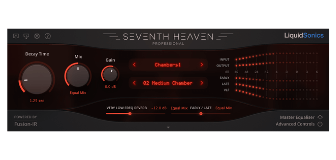
Seventh Heaven Professional
LiquidSonics brings us this reproduction based on the legendary Bricasti M7. OK, so it's a bit pricier but well worth trying out.
You can check it out here.
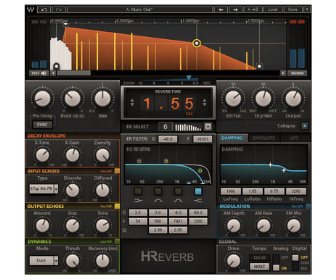
H-Reverb Hybrid Reverb
A beast for vocals, percussion and drums, H-Reverb by Waves is a good reverb to have handy.
Also on the pricier side for a plugin, so you may want to wait for one of the Waves sales which usually offer you significant discounts.
Use this link for an extra 10% off your purchase at Waves. You'll see the code to enter on the page in red.
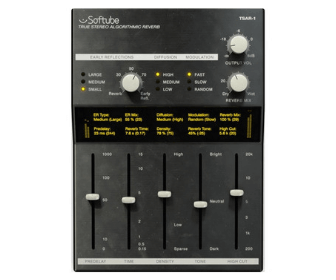
TSAR-1
They call it a "true stereo algorithmic reverb". This reverb by Softube definitely rates as one of the better reverbs available.
Don't be fooled by the simple user interface. This baby packs some serious punch and sounds real sweet. You'll have to hear it to believe it. So, try it out!
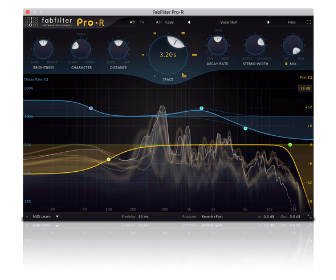
Pro-R
Last, but by no means least, we have the Pro-R reverb by the always fabulous folks over at fabfilter.
If you're looking for a reliable workhorse of a reverb at a price that offers serious bang for your buck then look no further!
Advanced Beginner Music Producer Reverb FAQ:
Below we do a bit of reverb revision and answer some of the most common questions advanced beginner music producers have when it comes to using reverb in music production and mixing.
What is reverb?
Reverb is what people perceive when sounds in a natural space reflect off surfaces and arrive back at the ears of people located in the same space. It can be distinguished from direct sound by the fact that it’s reflected sound.
You
can think of natural reverb in a room as the way a room reacts to
sounds. This is often called the impulse response of a room.
Here’s how it happens:
Imagine you’re in a room with a single speaker in it.
You play a sound, tone, speech or music through the speaker.
The speaker cone vibrates to create sound waves.
Some of the sound waves travel directly to your ears. These are direct sounds.
All of the direct sounds reflect off surfaces in the room. Some bounce back to your ears. These are reflected sounds.
Reverb is the accumulation and diffusion of all these reflected sounds.
Reverb vs. Echo:
Reverb is technically similar to echo in that both are created by the delayed return to the listener’s ears of reflected sounds and their relation to the direct sound in time.
The difference is that the amount of time that passes between the direct sound and the reflected sound is long enough in an echo to be distinguished as separate by our ears.
In other words, the attack of the direct sound and the attack of the reflected sound are far enough apart in time for us to hear distinct taps. Some say it’s at about a 30ms delay that reverb becomes echo and others say it’s a bit longer. Test this for yourself using a reverb or delay plugin that allows you to adjust the reverb time in milliseconds.
What’s the difference between reverb and delay?
We say delay when we refer to an effect that produces echoes or distinct reflections or taps that you can hear as quite separate from the original dry sound. This effect is quite clear and obvious when you have a delay time of longer than a second.
Shorten the delay time down to 10-20ms and your initial reflection starts to fuse into the original sound as your ear finds it impossible to distinguish the two from each other. This is where a delay plugin can start to sound like a short reverb.
Reverb is delay-based effect. So, we use delay to create reverb. Multiply the reflections, bring them much closer to each other in time and add some modulation and you get very close to what we call reverb.
What is a reverb effect?
A reverb effect refers to either an analog or digital audio processor.
The reverb unit or plugin simulates real reverberations by using delay on the original source signal sent through it.
It allows you to then mix the original or dry sound with the processed or wet sound.
In the real world reverb effects come in the form of reverb rack units, built-in reverbs on guitar amps, guitar reverb pedals and of course software reverb plugins.
Why is reverb important?
Reverb is what human ears use in part to judge the distance of a sound source. It also plays a part in the positioning of sound sources using our hearing.
We can use this handy fact as music producers or mixers to create the illusion on depth and space in our mixes.
What is reverb time or reverb decay?
Reverb time is the time it takes for the reverb sound to decay to nothing.
This is, in a simple practical sense, measured in time from the first reflection to where in the reverb tail resolves into silence.
More technically it’s often measured as RT60 which you can read more about here.
Reverb is often shown as a diagram with an amplitude and a time axis.
See the diagram.
What is reverb diffusion?
Natural reverb is created by the shape of the confined
space in which it is formed. An empty square room with perfectly flat
concrete walls will have a different impulse response when compared to
the same room with furniture and other objects in it.
The variation in surfaces causes a variation in the reflections which causes a variation in the character of the impulse response.
In simple terms, the more complex the nature of the room’s surfaces, the higher the diffusion of the reverb or early reflections.
In most digital reverb units or plugins diffusion is simulated by adjusting various reverb parameters to alter the character of the reverb. More diffusion on a plugin usually means reflections are closer to each other which spreads or smoothes out the reverb sound. Less diffusion will introduce more grain or twang, closer to traditional spring or plate reverb sounds.
What does pre-delay do in reverb?
Pre-delay is a reverb parameter you’ll find in plugins. It allows
you to set the time between the dry impulse or sound and the
initial/first reflection. You’re telling the reverb unit, with this
setting, how long to wait before it starts the reverberated sound or
reflections.
This parameter is useful when you want to create separation between the dry and wet signals. Let’s say your vocal is losing definition because of the reverb you’ve added. Try a longer pre-delay which can help to make the vocal pop just a bit better.
What is wet reverb?
You can distinguish between the dry original and the wet effected signal or sound. This is similar to the direct and reflected sound waves in a natural acoustical space. Dry means no reverb and wet means only reverb.
The balance between the dry and the wet signal is a very important aspect of music production and mixing as it determines the depth positioning and perceived size of the sound in your stereo field.
What is reverb damping?
Sound absorption and diffusion in natural spaces will lessen high frequencies in reflected sound waves. This means that the frequency distribution will be different depending on the space.
Reverb units or plugins with a damping parameter allow you to simulate the effect different surfaces will have in a natural space.
Let’s imagine you have a wispy airy indie-girl vocalist in the mix. Leaving all her high-frequency information in the wet reverb sound may cause the mix to sound thin or scratchy. Increase the damping and your reverb becomes a bit darker than the dry vocal sound. This gives the higher frequencies in instruments behind the vocal reverb a bit more space and the whole mix works better.
Should you put reverb on everything?
In short: No!
Here’s why you don’t really want to put reverb on everything…
Some instruments, like kicks and basses, have a lot of low-end information. Reverb added on low and even low-mid frequencies can very quickly cause issues in your mix.
A lot of the impact in a mix is caused by contrast. This applies to where you use or don't use reverb too.
Contrast a heavy reverb on your vocal with a little to no reverb on your main synth, for example. Add reverb to both and you're fast approaching a muddy mess.
How do you use reverb in a mix?
Reverb allows us to push an element back in the mix depth-wise. It also allows you to put an instrument or sound in it’s own psycho-acoustic space or in the same space as other sounds and instruments in the mix.
For example:
You have percussive ping that plays on the first beat of the second last bar of every eight bars. It sounds kind of rude, dry and abrupt in your mix. You want to blend it into the mix, give it some depth and let it linger a bit longer.
This is a short percussive sound. It’s simple and only one tick long. This means you may want to add a bigger reverb to contrast the short sound you’re working with.
Or:
You want to make a lead sound blend in better with the comping piano sound in your mix. Add a shorter room reverb to both sounds to place them in the same space.
What is Convolution Reverb?
Convolution reverb simulates an acoustical space by using a recording of an impulse response of that space.
The exact mechanics get a bit too complex for this post. In short, however, we capture the impulse response of a room and save it. We can then use that response to create a reverb that simulates the space.
This type of reverb is different from straight algorithmic reverb plugins which use only algorithms to emulate the sound of spaces.
So, to Wrap Up Reverb:
This post has now given you a decent introduction to the use of reverb in music production.
Your ability to apply reverb like a pro is something you develop over time as you get more and more familiar with what works and what doesn't when it comes to the use of reverb in music. This is done by listening with a critical ear to the use of reverb in music that you love and deliberately paying attention when you work with reverb.
You know very well by now that reverb can make or break a production, so it's a skill not to be glanced over for any producer who wants to produce world-class tracks.
So, polish up your reverb skills as much as possible and get those expensive sounding sounds!
The Biebs will approve. ;-)
Further Reverb Reading:
Check out this great article by Mike Senior over at Sound-on-Sound on how to use reverb in music production.
Get More Skills for Your Producer Skill-Stack:


Learn to understand equalisers and frequencies to supercharge your mixing skills and get results, fast...

New producer? Learn everything you need to produce your first professional track right now...

Would you like to discover the simplest and easiest way to learn music theory as a music producer?
Share this post. Spread the knowledge so other producers can benefit too:
- Renegade Producer
- Producer Skills
- Using Reverb
ⓘ Some pages contain affiliate links so I might earn a commission when you buy through my links. Thanks for your support! Learn more

