25-step music production process checklist and video workshop >>>
11 Handy Home Recording Tips for Advanced Beginner Music Producers & Beat Makers
Whether it's that pristine heavenly chorus vocal, 16 bars of ruckus rhymes or a fat and chunky bass riff, there will come times when you need to record at home, even if you mostly make beats or electronic music. The tips you discover on the page below should prove helpful when you prepare to record music in your home studio.
So, when the time to lay down those killer takes arrives...
... you'll be ready with these home recording tips!
Yip, it's time to set the scene, flip on the red light and settle in for another recording session.
I trust these 11 home recording tips will make it easier to get something stellar down onto your disk:
11 Home Recording Tips...
1. Know Your Mission & Get Ready for It
Your mission is of course to capture the magic. This doesn't just happen. It takes some prep and good execution to ensure your session is a success.
Run
through your basic recording strategy before you hit the studio. Your
plans may
change on the day, but some plan is better than no plan. Set up and
test every piece of gear you may want to use. Make sure instruments
are in tune. Re-string, replace and tune anything that needs it.
You want the gear and software ready for action before your session starts. Hire any extra gear you need and have it all ready on the day.
An organized session is a happy session!
Create a simple schedule and strategy, especially if you're recording more than one instrument. It doesn't have to include the finest details or include all the settings you plan to use. Think more like a elementary outline plan to maintain your direction and keep momentum and flow up when you track.
2. Use Your Room, or Don't
Some pro studios are known for the sound of their rooms. The A Room at Sound City is a legendary example:
"Studio
drummer and Toto member, Jeff Pocaro, insisted that you only had to set
up the drums in order to get a good drum sound. When asked to guest
drum on a Nine Inch Nails recording, Dave Grohl’s replied: “I’ll do it
if you record at Sound City."
In a smaller studio your room sound can be your best friend or worst enemy. Usually it's the latter.
Does your room add something special to your vocal, guitar or drums? It would be wise to capture that when you record.
Room ringy and rumbly? Eliminate as much of the room sound from your recording. Mic closer to the instrument and use surgical precision when you position your mics to cut out unwanted tones. Use absorbers like acoustic panels around your source to deaden reflections and focus in on your direct sound if needed.
3. Use Your Ears
A working knowledge of mic techniques is of course worth its weight in
gold. That said, you can AB, XY or Blumlein all you want and still get
it wrong if you don't listen to what you're doing.
Now, at home, you probably won't have an
assistant to move the mics around while you sit, listen and adjust in the
control room. A good trick is to use good headphones to listen as you set up mics. You could even put your head where you plan to put the mic to hear what it sounds like in that position. You may want to skip this last suggestion when it comes to your kick drum! ;-)
NEVER just place a mic in a position because that's how someone else did it.
The goal is to capture the sound you want when you track and not to trust that things can be corrected with voodoo later on in the mix process. Get it right at the source.
4. Take Time to Test
It's easy to fall into a habit of using the same gear. Try different mics, pre-amps and other toys on your instruments or vocals if you have the option and time on the day. Also, test different combos in your recording chain. Choose the gear you'll use based on how it sounds and not what's "supposed" to work.
Otherwise,
try out different options and choose the best combo you've got for the
job. Don't ever just stick something up if you have a choice. A quick shoot-out can make a world of difference to your final result.
So, before you hit record...
... test.
5. Gain Staging
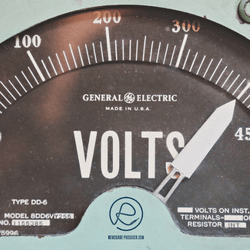
Kinda basic but worth a mention. You want to make sure you don't clip the signal at any stage of your signal chain so don't set levels too hot.
Digital distortion is a thing. Not a pretty thing like some analog distortion. Avoid it like a fiend.
Back
in the analog days another consideration was the noise floor of analog gear. This
meant you wanted to get a decent level on your signal because a low
signal-to-noise ratio would make life difficult during the mixdown. The reason is obviously that you cannot raise signals in a noisy track without raising noise at the same time.
Lucky for us, with digital recording, the noise floor is so low that it's almost negligible unless you're going through analog gear on the way in. Still, you want to aim for a decent level, but steer well clear of clips with enough headroom at every stage of your chain. Light compression may be needed if your vocalist or instrumentalist is all over the place in terms of dynamics.
6. Digital Audio Quality
Recording at 24-bit/44kHz is fine. You can get away with less but you start to sacrifice options if you go lower than this with your recording quality.
You can use up to 48kHz if you can handle the storage requirements.
Anything above that is probably overkill in most cases.
Click the image of the interface icon to read more about the ins and outs of audio interfaces and sound cards.
Nuff' said!
Let's talk cans...
7. Killer Cans
A bassist might want more
drums in the mix while a vocalist might want more guitar. Work on it
till your performers are happy.
Also, pay attention to your
headphone levels when record to prevent bleed onto the
recording, especially if your vocalist is of the one ear open variety.
Used closed headphones only, of course. My favorite tracking headphones are still the tried and tested DT770s, much beloved in studios across the planet.
A tight headphone mix can make a world of difference to the performance, so it pays to spend a bit of time to get it "just so".
8. Get a Vocal Booth or Make One
A clean dry vocal will make your life much easier during
mixdown. This means you want to in most cases cut out as much of the reflected room sound as you can. This is where you need a booth of some kind, even if it's makeshift and temporary.
A large walk-in closet is a good option as long as you
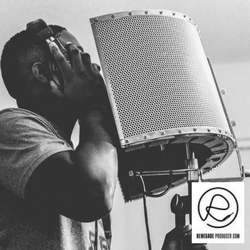
pad it with absorbers (and keep the clothes in there!). Otherwise, you can use a reflection shield or baffle to isolate your sound. Just pay attention for ringing tones caused by
the reflections when you use a reflection shield. Adjust the mic if you notice any unwanted
ringing at a particular frequency.
9. Learn Some Studio Vocal Mic Techniques
Great tracks start at the source and when you record the source is the performance.
You may the vocalist, in which case you may want to read and
apply these basic home recording tips for vocalists.
Working with an outside vocalist?
Still, read the above tips. Then, gently and kindly coax your vocalist into a great performance without bruising their ego. This is an art in itself. ;-)
10. Make the Tech Invisible
Your performers are there to perform. Your job is to capture the magic. Nothing technical should get in the way.
Test your gear before the session as mentioned. Make sure your DAW software is primed and ready to go. Have extra back-up cables ready. Have extra everything available as much as possible.
There
is nothing worse than having to wait around for technical issues to be
resolved when you are ready to lay down the mother of all takes. Can anyone say mood killer?

So, make sure you get the vibe right and the tech out of the way.
Speaking of vibe...
11. Engineer the Mood
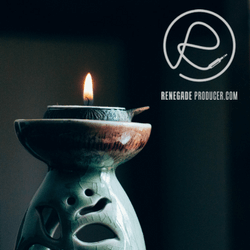
There's a reason lava lamps became a cliche in studios. Same for subtle LED lights, candles, salt lamps, plush furnishings and Persian carpets.
The mood or vibe of the space translates into the performance which either allows you to capture magic or regret the whole session. Spend some time on aesthetics and the vibe to make sure you create a space where art can happen.
Engage all the senses but be careful for anything too overpowering, especially when it comes to scent. Keep it subtle.
It may not be absolutely essential but a bit of attention to detail here can make it much easier for performers to access optimal states of flow.
I hope you've enjoyed these 11 home recording tips and find them useful. If you have, please share this page and remember to subscribe below for exclusive content!


Learn to understand equalisers and frequencies to supercharge your mixing skills and get results, fast...

New producer? Learn everything you need to produce your first professional track right now...

Would you like to discover the simplest and easiest way to learn music theory as a music producer?
Share this post. Spread the knowledge so other producers can benefit too:
- Renegade Producer
- Music Production
- Home Recording Tips
ⓘ Some pages contain affiliate links so I might earn a commission when you buy through my links. Thanks for your support! Learn more
